What’s not to like about this scrumptious puff pastry, topped with flavorful caramelized roasted veggies and fresh goat cheese? INGREDIENTS Start by thawing the puff pastry sheet and covering it with plastic film so it won’t dry out. Then, pre-heat the oven to 350F (180C).Roughly […]
Let’s roll our sleeves and start making this easy-to-follow recipe for homemade sausage rolls. Flaky puff pastry encases a flavorful blend of seasoned sausage, creating a perfect handheld treat for any occasion.As a twist, we’ll add a creamy feta cheese mix to elevate the taste […]
How about a Mediterranean escapade with this Feta Phyllo Roll recipe, where layers of crisp, golden phyllo pastry embrace a luscious filling of tangy feta cheese? Let’s raise the bar on your appetizer game effortlessly as this simple yet sensational dish takes center stage at your next gathering, leaving a lasting impression on all who savor its delicious charm.
What you’ll need for feta phyllo rolls:
a roll of 14 x 18 inches Phyllo dough (8 sheets total)
1/4 lb good quality Greek feta cheese (113 grams)
Three spring onion greens chopped
bunch of parsley leaves chopped
freshly ground pepper to taste
⅓ cup heavy cream
grated zest from a lemon
2 Tbs melted butter
flour for dusting
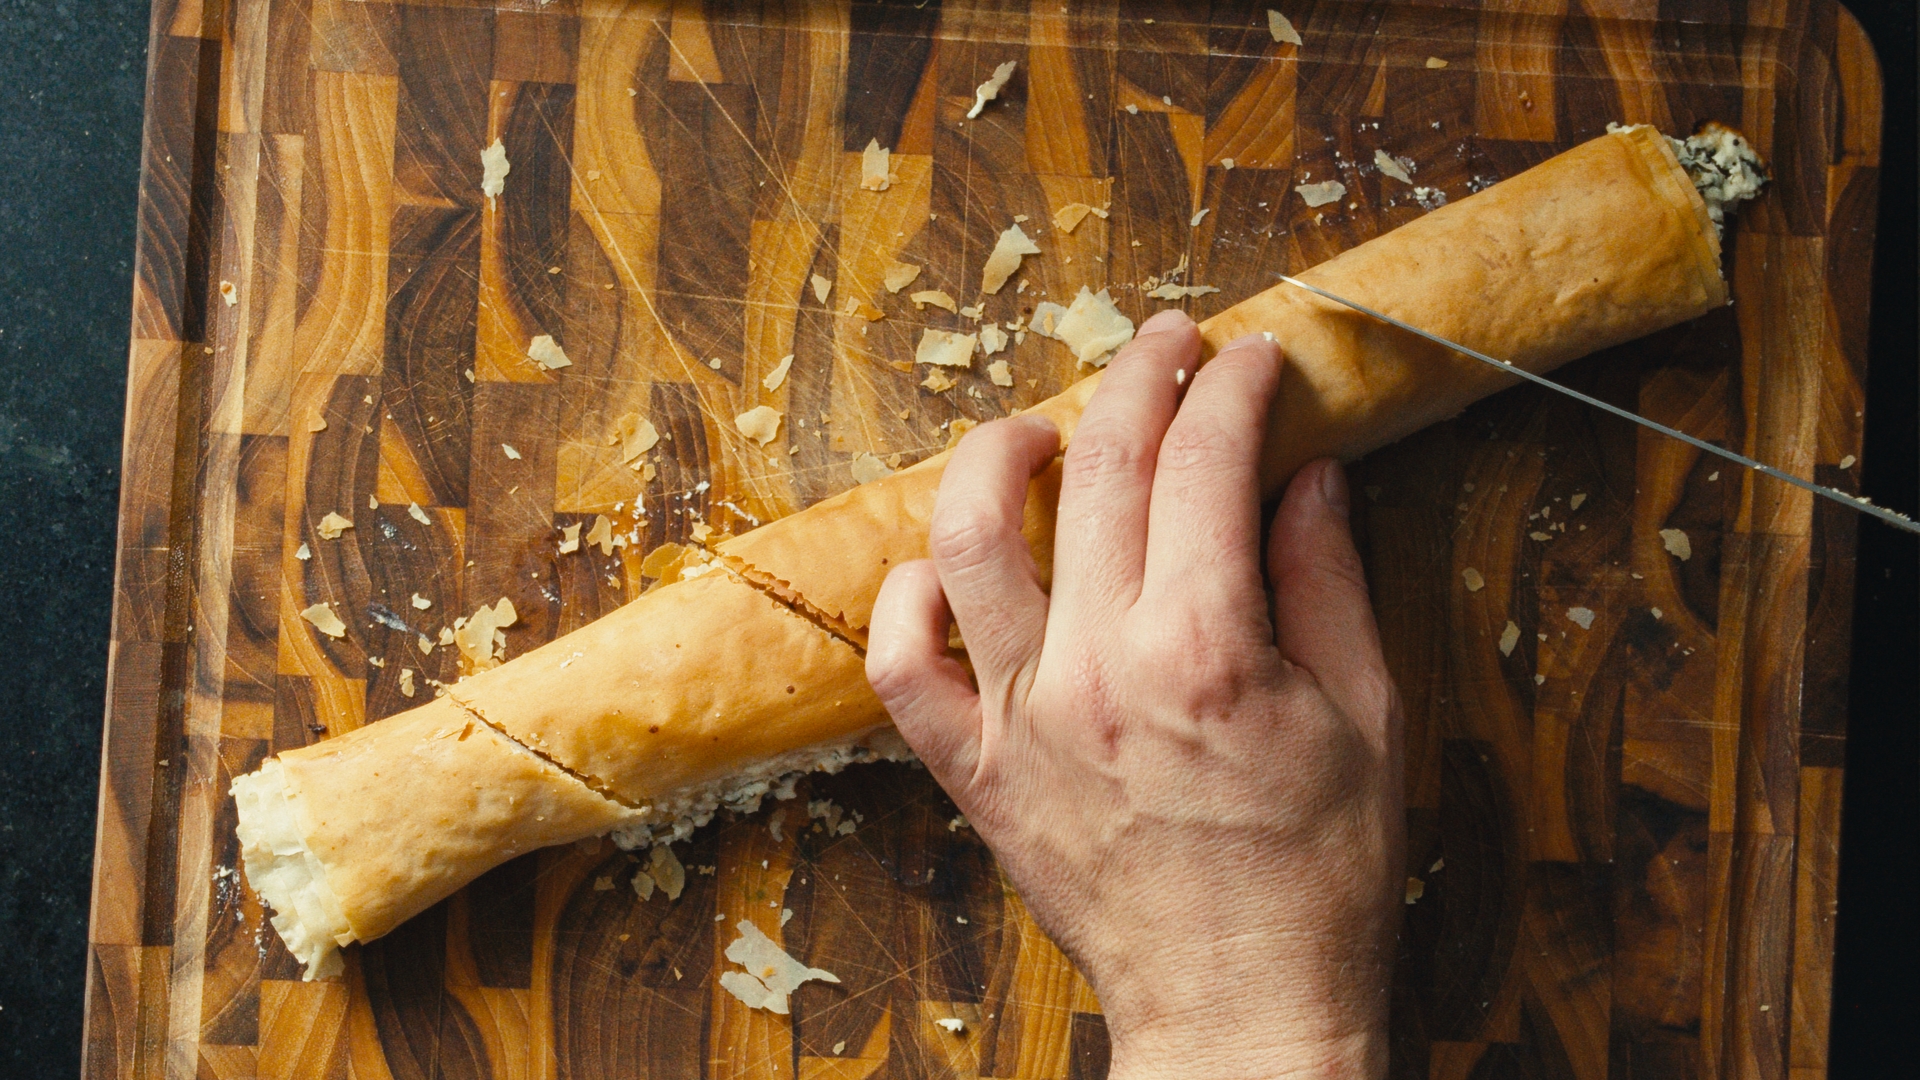
Roughly crumble the feta with a fork. Chop the spring onion greens and the parsley leaves and add them to the feta cheese. Add a few turns of freshly ground pepper and the heavy cream. Grate the zest of a lemon and roughly mix. Melt the butter, then add the extra virgin olive oil. Gently unroll the Phyllo dough, peel two sheets, then roll it back and cover it with a damp towel to prevent drying. Lay one of the sheets on a dry surface and brush generously with the melted butter and oil mix. Place another sheet of Phyllo on top, then brush it with the butter/oil. Sprinkle some flour on top and place another sheet. Repeat the butter/oil brushing and place another sheet on top. Finish with another Phyllo sheet on top, brushed with the melted butter/oil mix. You will now have four stacked Phyllo sheets separated with the melted butter/oil mix. Add half of the feta cheese mix along the shorter edge of the sheets. Wet your fingers and push the feta mix together so it’s evenly distributed along the edge. Gently start rolling the Phyllo dough, pressing as you move to get a snug sausage—place on a parchment-lined cookie sheet and set aside. Repeat the same method with four more sheets and the leftover feta mix. Place in a 375 F oven (190 C) in the middle rack for about 30 minutes until golden, brown, and delicious. Let the rolls cool for 5 minutes, cut them into small logs, and serve while warm.
Imagine the irresistible aroma of melted cheese, zesty tomato sauce, and your favorite pizza toppings wrapped in a perfectly baked puff. This homemade pizza puff recipe satisfies your pizza cravings and adds a fun and portable twist to the classic pizza experience.Start your ovens! What […]
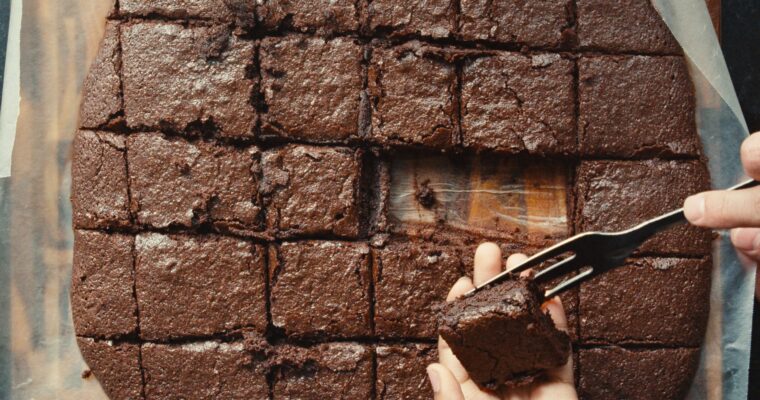
Imagine a golden-brown exterior giving way to a fudgy, melt-in-your-mouth center, sending waves of chocolate bliss through your taste buds. This isn’t just a recipe; it’s a journey into the heart of chocolatey decadence. Let’s dive into perfection with these irresistible homemade chocolate brownies! You’ll […]
Here’s the process I’m using for my basic sourdough bread. Even if it looks like it has a lot of steps, it’s a simple recipe once you get started. I’ll assume you already have the starter. I will make a separate video on how to get one going if you don’t have one yet.
The whole process consists of 4 main chapters:
Feeding the starter
Mixing the ingredients
Stretching & folding
Baking
FEEDING THE STARTER:
sourdough starter
4 Tbs all-purpose flour
1 Tbs dark rye flour
about 1/2 cup of warm water
FOR THE BREAD:
150g peaked sourdough starter
750g bread flour (I’m using King Arthur’s 12.7% gluten content)
510g warm water
50g warm water + 1 Tbs kosher salt (dissolved)
Sourdough usually improves flavor if you keep the dough in the fridge for 1-3 days. Don’t go longer than that since it might lose its potential to rise.
So, typically, if you want your bread today, start it at least a day ahead.
DAY 1: Begin in the morning by feeding your starter and mixing it to form a thick pancake-like batter. Add a rubber band as a reference for the starting level and set it aside in a warm place on the counter. I like to place it in a sunny spot. The yeast will thank you. It usually takes about 3 hours for my starter to peak (meaning it reaches maximum volume).
Follow up with measuring and mixing together the bread ingredients in a big bowl. Start with the flour and continue with the starter. I add the flour and starter in the same bowl and just hit the tare button on the scale after each ingredient—less stuff to clean up.
Add the 510g of water, and using a spatula or a wooden spoon, mix everything together into a shaggy dough. It’ll look dry at first, but it will start getting moist as the flour absorbs the water. Continue kneading for a minute or so with your hands, then cover it with plastic and let it sit in a warm place for 30 min. Do not over-knead. I used a kitchen aid to mix before, but I learned that you get a much denser crumb as opposed to the nice irregular holes, which makes the bread more airy. After the 30 min rest, add the 50g of water with the dissolved 1 Tbs of kosher salt. Keep kneading for 2 minutes until most of the water is absorbed. The dough will feel wet and loose, but don’t worry; it will become smoother in the next steps. Leave the dough to sit for 30 min covered.
Fold & Stretch: This technique will develop the gluten structure in your dough, making it chewy. After that 30 min, grab the side of the dough, stretch it up, then fold it over itself. Repeat this with the sides. Cover and let it sit for 30 min. Next, repeat this step two more times. Some people do it more often, but I didn’t notice a difference. You will notice that with each fold & stretch step, the dough will become more springy and smother. It will be tacky but not sticky.
Pre-Shaping: Dump the dough on the counter and gently tuck the bottom sides with a plastic paddle. Dust with flour, cover with a kitchen towel, and let it sit for 10 min.
Shaping: Divide the dough into two halves with the paddle. Take one half and stretch it gently into a rough, oval shape. Then, gently bring the two opposite sides over the middle. Do the same with the other two sides. Place the dough with the seam side on the counter, then gently form it into a ball shape by tucking the bottom side in as you turn it. Use the paddle to help tuck the bottom in as you’re turning. This will help add surface tension to the bread. Don’t worry, it doesn’t need to be perfect, you’ll get better with each bake. Place the round ball into a well-flour-dusted proofing basket seam-side up. Sprinkle some cornmeal on top, and place it into a plastic bag in the fridge. Repeat this with the other half of the dough. Again, you can leave it in the fridge for up to 3 days (I left it once for four days, and it was fine).
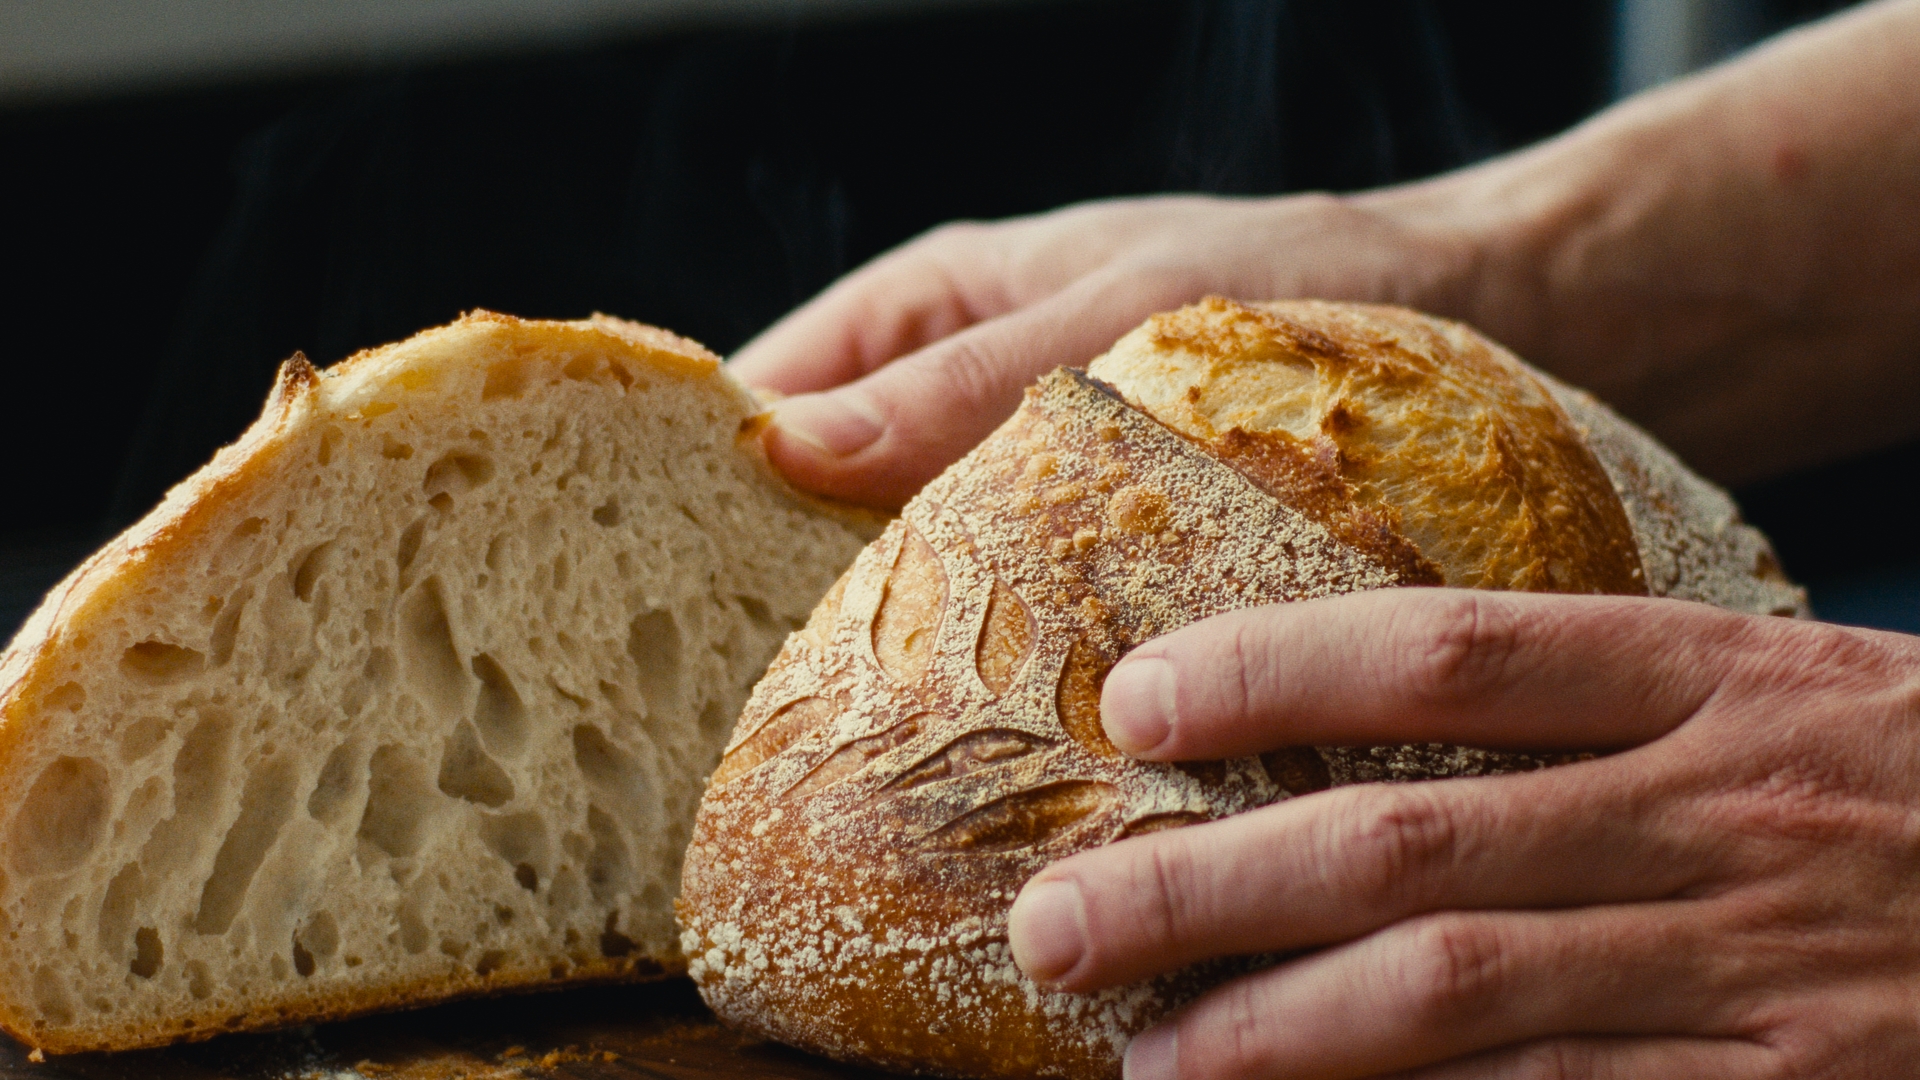
Baking: On baking day, set your oven to 500F (260C) and place a cast iron Dutch oven in the middle rack. We want the Dutch oven to heat up together with the oven. Be careful when you take it out of the oven it will be BLAZING HOT! Meanwhile, cut a 15 x 12 inches piece of parchment paper and fold it in four. Then, cut it into a P-shape form. This will be our handy bread sling, with two handles to lower our bread into the scorching Dutch oven. Take one basket out of the fridge, place the parchment paper on top, and carefully turn it over on the counter. Gently pull the basket off. Using a sharp lame (or box cutter blade) score superficial slits into the surface of the bread in a fun pattern. Use your creativity here. These are only for decoration. Next, cut a deeper slit into the middle of the bread. This cut will allow the bread to rise while in the oven. Take the Dutch oven out and, using oven mittens, gently lower the bread into it using the two side handles of the parchment paper. Place it back in the oven and set your timer for 18 min. After 18 min, take the lid off (USE OVEN MITTENS!), lower the oven temp to 425F, and bake for another 18 min. Take the Dutch oven out and place the bread on a cooling rack using kitchen tongues. I know you’re tempted to cut it open, but let it sit for 15 minutes to cool down. The bread needs relaxing after being in the oven. Just like you! You can repeat the baking process for the other basket.
It all started with the ridiculous amounts of mushroom I usually buy from the grocery store. I always over estimate the quantity for mushroom consumption in our family. So, as it is with all those brilliant ideas, when stars align and you have just the […]
With three days before Christmas, while the southern plains are pummeled with snow storms, Chicago enjoys a strange mild winter with temperatures in the mid 40s with no precipitations! As much as I enjoy a white Christmas, and believe me, we have quite a bit of those in Chicago, I also appreciate spending time in the kitchen, baking, instead of shoveling snow.
For those of you lucky dogs and ducks that inherited a piece of my multi-million dollar sourdough starter, here is the first blog post in the series discussing how to actually bake a sourdough bread that will gain back your spouse’s respect, as your kids and friends would bow in front of you and address you as “Your Royal Majesty”. This series is a remastered version of the original Sourdough Chronicles I wrote a while ago.


 facebook
 instagram
 twitter