The Mighty Bagel

I had this next chapter in the BBA challenge on my list for a very long time but only now I got to actually get my hands dirty (literally!): Bagels! Partly because of my quest of finding the highest gluten content flour, and partly because of the residual insanity in my life that never seems to clear up. Here is my first adventure in baking Bagels, hope it’ll inspire you.
Tradition!
In America, we typically associate the Bagel with the Jewish community (and rightly so) since they were brought over by Jews who immigrated from various Eastern Europe regions. New York City specifically, became the Bagel center of the Universe with a high concentration of bagel craftsmen. In early 1900 the NYC bagel makers established certain hand-made bagel crafting standards so they formed a trade union local called the Bagel Bakers Local 338 to preserve the authenticity.
It is also known that observant Jewish households would make bagels on Saturday evenings as the Sabbath ended that called for a quick bagel recipe as they were not allowed to do any cooking.
Also, the bagel was created in Krakow, Poland much earlier than the much circulated legend that it was created in honor of Jan Sobieski (King of Poland) who won the war with the Ottoman Turks.
 High Gluten Quest
Now, this is NOT the soft, steamed bagel you would find in stores, or frozen. This is the typical water boiled bagel with the chewy and dense texture. The Real Bagel.
That my friends, calls for the highest gluten content flour on Earth. For instance, King Arthur’s All-Purpose flour has about 11.7% protein content, their Bread Flour (which I always use for my sourdough bread) has 12.7%, but the highest gluten content flour they produce (claiming that is the highest found) is Sir Lancelot with 14.2% protein!! All unbleached, of course. The highest gluten content flour will secure a chewy, and density that will make your bagel come dangerously close to the original New York water bagel (leaving out the debate about fact that the New York City’s water makes their bagel so notorious).
Mind you, Sir Lancelot is not cheap. On their website 3 lbs goes for $7 bucks not considering shipping charges! But, you can always find it cheaper (with a bit of luck) at Mejer’s or Whole Foods, etc. You might also be-friend your local baker or bagel shop and beg them to sell a couple pounds of their high gluten flour. Chances are that they use Sir Lancelot. Here’s my 50 lbs precious flour bag.

A Word (or more) on Malt Syrup
This ingredient (aka Barley Syrup), my fellow bagel fans, is the key to the typical flavor found in the water bagel. Not easy to find, but it can be ordered online as a syrup or in the form of diastatic malt powder. If you have a beer supply store nearby (you lucky dogs), it will carry it for sure. The diastatic malt will enhance the flavor and will speed up the release of the sugar from the starch.

Making The Sponge
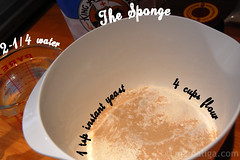
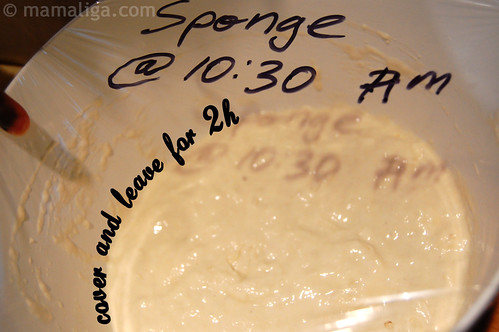
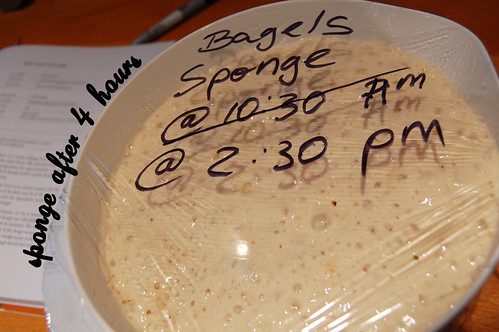
I started out with making the sponge. Peter Reinhart mentions in the book that this is not a typical method found in bagel shops but it is a critical step to enhance the flavor all together by the longer fermentation. Simple as that, I mixed the three ingredients (water, instant yeast and flour) together to a pancake like batter, wrapped it with foil and let it ferment at room temp for about 2 or more hours. Should start bubbling and double in size. No big science here.:
- 1 Tsp (.11 oz) instant yeast
- 4 (18 oz) cups unbleached high-gluten flour
- 2½ (20 oz) cups water at room temp

The Dough
- ½ tsp (.055 oz) instant yeast
- 3¾ cups (17 oz) unbleached high-gluten flour
- 2¾ (.7 oz) Tsp salt
- 2 tsp (.33 oz) malt powder
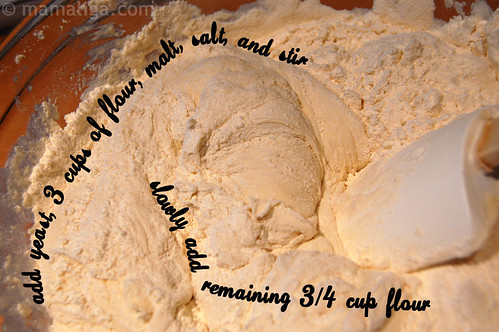
Next, I started working on the dough, by stirring in the yeast in the fermented sponge, added 3 cups of the flour, the salt, and the diastatic malt powder. I mixed all these with a rubber spatula since I don’t yet have a KitchenAid mixer. Then I added the remaining 3/4″ cup of flour and continued mixing until I formed a stiff ball.
The idea here is to use The Force and your culinary instinct to judge how much flour to work in. This dough is the stiffest of all I encountered up to now in my doughy travels so the last 3/4 cup of flour will be used to “fine tune” the dough stiffness, if that makes any sense.
Next, it was time for a workout. I kneaded this dough for approximately 10 minutes, until it passed the window pane test and had a temperature of something between 77 and 81° F:

I took a piece of the dough and stretched it until I formed a thin translucent membrane while holding it to a light source. If the membrane starts ripping, it needs some more kneading to develop more gluten network.
Forming
This is the part in the movie where I formed the bagels. Really fun! First, I measured out 4½ oz pieces, formed them into rolls and let them sit for 20 minutes under a damp towel.

Rock and Roll (literally)
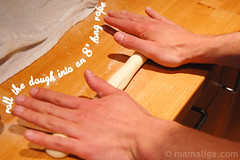
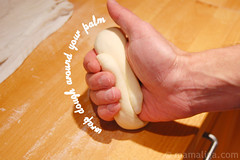
Roll and rock, to be exact if you consider the order. It wasn’t a big deal as I thought it would. I rolled out each piece into an 8″ long sausage, wrapped the dough around my palm, overlapped the ends, then pressing against the counter (overlapping ends down), and rocked and rolled to make the seal. I had to wrestle with the bagel cord somewhat (to bring it to that 8″ length) as it was very elastic – because of the high-gluten content – and had a tendency to shrink back.

I arranged the bagels 2″ apart on two sheet pans lined with oil misted parchment paper. Then again I misted the bagels, covered them in plastic and let them rest at room temp for 20 minutes.
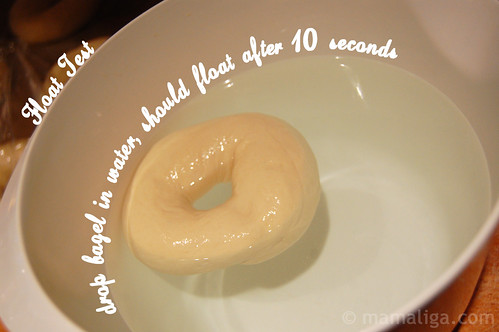
Float Test
This test will tell if the bagels are ready to be retarded in the fridge for more flavor development. The trick is to plop a test bagel in a bowl filled with room temp water and count to 10 (only one test bagel will suffice for the whole batch). If it floats to the surface within those 10 seconds, it means they are ready to go in the fridge! Mine floated to the surface like in 2-3 seconds because I think I left them more than 20 minutes to rest in a somewhat warm kitchen (73 F) and they developed too much yeast gas. The idea here is to have enough proofing but not too much so the bagel texture will stay chewy and elastic. The more you leave the bagels out to proof (beyond the 20 min), the more yeast will do its work, filling the bagel with gas (thus the rapid floating to the surface), resulting in a bigger crumb – not necessarily appealing if you ask the bagel purists. Once this was done, I placed the trays in the fridge overnight and went to bed.
Rise and Shine!
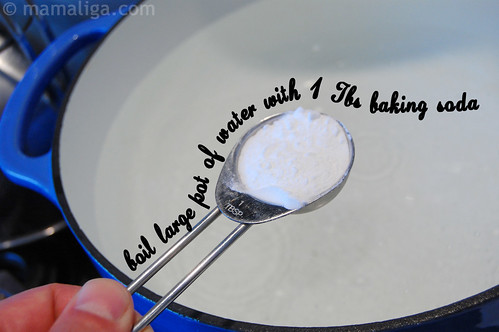
I had the rise down and now was time for the shine. The shine because of that distinct shiny surface you get on a typical bagel. Apparently that is achieved by using a small amount of baking soda in the water used to boil the bagels. This will alkalize the water and add a certain quality to the surface of the bagel that will result in more shine while baking.
Early morning the next day, had the oven going at 500 F. While that was warming up (it takes about 45 minutes for our oven since it is an old one and I have two massive pizza stones in there), had the largest pot in the kitchen boiling with water 1 Tbs baking soda.
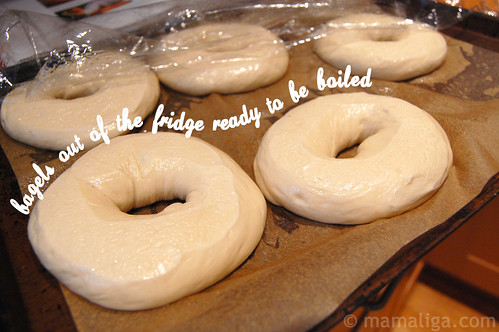
I pulled the bagels out of the fridge. It looked like they have risen somewhat as they looked a little bigger:
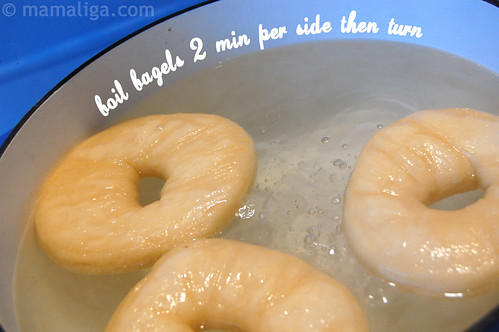
Plopped them in in batches of three, boiling them about 2 minutes per side (the more you boil, the chewier the bagel)…
…scooped them out with a spider, drain and placed them back in their trays:

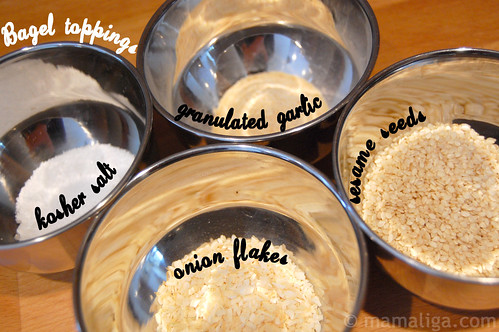
Tasty Toppings
This is the part in the Bagel movie where I pulled out my creativity. I had sesame seeds, kosher salt, red pepper flakes, granulated garlic and onion flakes on hand. Traditionally you would find minced onions tossed in oil, poppy seeds, etc. Have these ready to go since you want to sprinkle the bagels while their surface is still sticky from boiling:
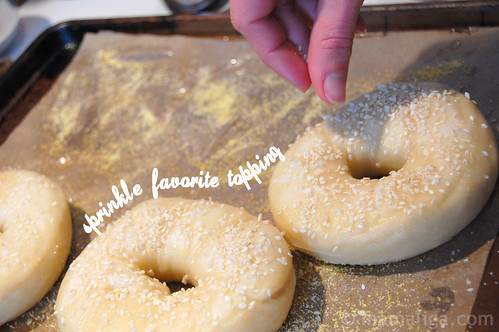
And sprinkle ad libitum:
Voila! Bagels waiting patiently to hit the 500 F oven on the two middle racks. I baked them for about 5 minutes then turned the pans to give the bagels an even heat exposure, lowered the temperature to 450 F and bake for another 5 minutes until they were GBD (Golden Brown and Delicious).

And bagels come out… I left them to cool on cooling racks, impatiently waiting for 15 minutes before trying them out!

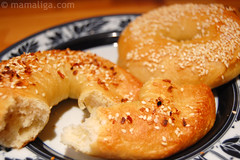

If you read it all down to here, you owe it to yourself to try this bagel recipe out! This batch of bagels kept for only two days in my house. We all found quick excuses to eat them in the morning toasted, at noon with a lovely cream cheese spread, and at night with well… everything. They came out truly sublime having all the qualities of a real water bagel. Would it pass the tests of a cork-sniffer bagel purist? Maybe not, but heck – it came dangerously close to the real New York City Bagel!

You’ve done a wonderful job of posting step-by-step photos to create the most divine bagels ever! You’ve convinced me to try them….every time I need high gluten flour or bread flour, I’ve just added 1.5 teaspoons of vital wheat gluten per cup of flour. This seems to give my breads the chewy texture.
So impressed!
I love the name of your website. Its inspired! I thoroughly enjoyed your bagel post!
OOh, I miss really good American bagels. You just cannot get them here in Thailand. They’re always hard and a bit dry and often don’t even taste like bagels, and don’t get me started on the cream cheese 🙂
I bet if you try making bagels yourself – you’ll NEVER buy them from the store ever again!
Hi…
So impressed!You’ve done a wonderful job of posting step-by-step photos to create the most divine bagels ever! You’ve convinced me to try them…I thoroughly enjoyed your bagel post!go forth and keep writing.
I’m going to take your guidance of 2tsps of diastatic malt for a 1kg of flour to use in my recipe today. I can find recipes for non-diastatic malt but not with the activated malt. I will do a side by side of both and see how quick the active malt is and if any other differences.
I’ve already made a long post on bagels part I and now need to finish the bagels part II with this experiment.
thanks for the help with your recipe.